

항상 블로그에 글은 올리지만 블로그를 쓰면 깃헙에 커밋하는 방식이 없을까 찾던 중 방법을 찾게 되었다.!!
안 그래도 리드미에 블로그를 추가해서 넣고 싶었는데 node.js를 통해 커밋과 리드미를 꾸밀 수 있는 방법을 찾았다.
RSS 설정
먼저 나는 티스토리로 글을 쓰고 있어서 티스토리 설정에 들어가 rss 설정해줘야 한다.
설정 -> 관리 -> 블로그


해당 사진처럼 설정을 해줬으면

https://{본인 티스토리 주소}.com/rss 들어가서 해당 사진처럼 나오면 일단 성공!
ex ) https://baesaa0304.tistory.com/rss
준비물
먼저 node.js 설치 , 그리고 vscode가 있어야 한다.
없을 경우 node.js 설치!!
brew install node
설치가 완료 되었으면 해당 명령어를 통해 잘 설치가 되었는지 확인
❯ node -v
v22.6.0
GitAction 설정
먼저 내 소개페이지 readme에 블로그를 5개 정도 보여주기 위해 설정을 해야하니 원하는 폴더에 깃허브를 clone하기!
git clone {본인 레파지토리 주소}
git clone 한 폴더를 열어주고, 다음과 같은 명령어를 입력한다.
npm init -y
npm i rss-parser
그리고 vscode에서 package.json 파일에 들어가 type 과 start 를 추가하기
	"main": "index.js",
  	"type": "module", // 추가
  	"scripts": {
    	"test": "echo \"Error: no test specified\" && exit 1"
    	"start" : "node readmeUpdate.js" // 추가
이번에는 readmeUpdate.js 를 아래와 같이 작성하고 RSS 피드 가져오기에 있는 블로그 주소를 본인의 블로그 주소로 바꿔줘야함!!
import { readFileSync, writeFileSync } from "node:fs";
import Parser from "rss-parser";

// 기존 README.md 파일 읽기
const readmePath = "README.md";
let readmeContent = readFileSync(readmePath, "utf8");

// RSS 파서 생성
const parser = new Parser({
  headers: {
    Accept: "application/rss+xml, application/xml, text/xml; q=0.1",
  },
});

// 최신 블로그 포스트 추가하는 함수
(async () => {
  // RSS 피드 가져오기
  const feed = await parser.parseURL("https://baesaa0304.tistory.com/rss"); // 수정

  // 최신 5개의 글의 제목과 링크를 추가할 텍스트 생성
  let latestPosts = "### Latest Blog Posts\n\n";
  for (let i = 0; i < 5 && i < feed.items.length; i++) {
    const { title, link } = feed.items[i];
    latestPosts += `- [${title}](${link})\n`;
  }

  // 기존 README.md에 최신 블로그 포스트 추가
  const newReadmeContent = readmeContent.includes("### Latest Blog Posts")
    ? readmeContent.replace(
        /### Latest Blog Posts[\s\S]*?(?=\n\n## |\n$)/,
        latestPosts
      )
    : readmeContent + latestPosts;

  if (newReadmeContent !== readmeContent) {
    writeFileSync(readmePath, newReadmeContent, "utf8");
    console.log("README.md 업데이트 완료");
  } else {
    console.log("새로운 블로그 포스트가 없습니다. README.md 파일이 업데이트되지 않았습니다.");
  }
})();
Github Actions 를 이용해서 주기적으로 readmeUpdate.js 를 실행해서 README.md 파일을 업데이트하게 하기 위해서는
.github 폴더 -> workflows 폴더 -> 그 안에 update-readme.yml 파일을 생성하면 된다.

이제 update-readme.yml 파일을 작성해야하는데 그 전에 토큰을 만들어야 한다. 토큰 권한은 workflow scope 권한을 포함해서 필요한 권한을 선택하면 된다. 토큰을 만드는 방법은 아래와 같다.
본인 프로필 클릭 -> setting -> Developer settings -> personal access tokens 들어가서 만들어주면 된다.
한번 생성한 토큰값은 꼭 복사해서 보관하기!!

그 다음 해당 레포지토리에 들어가서 setting > secrets and variables > actions 로 이동해서 새로운 시크릿에 복사해두었던 토큰 값으로 설정해주면 된다.

update-readme.yml 파일은 다음과 같이 작성하며
cron 을 원하는 대로 설정하고 github 이메일과 github 사용자 이름, 그리고 방금 만들었던 토큰 이름을 수정하면 된다.
name: Update README

on:
  schedule:
    - cron: "0 */8 * * *" # 매 시간 정각에 실행
  push:
    branches:
      - main

jobs:
  update-readme:
    runs-on: ubuntu-latest
    steps:
      - name: Checkout repository
        uses: actions/checkout@v3

      - name: Set up Node.js
        uses: actions/setup-node@v3
        with:
          node-version: "16"

      - name: Install dependencies
        run: npm ci

      - name: Run update script
        run: npm start

      - name: Commit README
        run: |
          git config --local user.name 'your-name' # 수정
          git config --local user.email 'your-email' # 수정
          if [ -n "$(git status --porcelain)" ]; then
            git add README.md
            git commit -m 'Update README with latest blog posts'
            git push
          else
            echo "No changes to commit"
          fi
        env:
          GH_PERSONAL_TOKEN: ${{ secrets.GH_PERSONAL_TOKEN }} # 수정
이제 모두 끝났으니 git push 을 해서 반영을 해보자!
Git action permission 설정
그러나 오류가 발생!
Github에서 Actions 탭에서 build 오류 내용을 살펴보면 403 permission 오류가 발생한 것을 알수있다.
이를 해결하기 위해 Settings 메뉴로 들어가서 Actions > General에 들어가기!
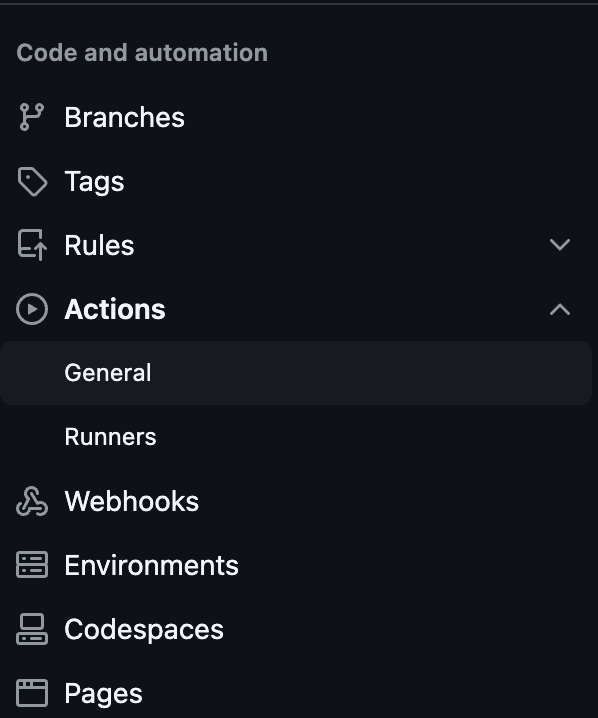
스크롤을 내리면 Workflow permissions 항목에서 Read and write permissions 선택한 뒤 저장

다시 시간이 지난 뒤 Action을 확인하면 정상적으로 처리된 것을 확인할 수 있고 리드미에 잘 올라오는 것을 확인이 가능하다.

성공!!! 😁
References
'트러블슈팅 > Git&Githube' 카테고리의 다른 글
| [Git & Github] 에러 [rejected] main -> main (fetch first) (0) | 2024.10.10 |
|---|---|
| [Git&Github] (Github Repository) 레포지토리 합치기 (0) | 2024.09.18 |
| [Git&GitHub]이클립스 Cannot move project~ 오류 (0) | 2024.08.06 |